
As you may know from my staff bio or Jewelry Making article, one of my passions is crafting. I spend a lot of my time crafting various things, such as jewelry (mainly earrings and bracelets), digital scrapbooks for my Instagram posts, paper crafts, and collages. At the moment, my room is a treasure trove of materials from several different unfinished projects. Particularly, over the last couple months I have done various crafts that I would like to share with you to hopefully inspire and ignite creativity. These crafts help me relax after a long day of school, especially whenever I have a lot of projects or busy work due. I hope you enjoy this guide and that it inspires you to craft!
- Senior Memory Box

Over the Summer I started making a senior memory box after seeing many people make them on TikTok and Pinterest. Currently, I am still working on it and adding stuff to the box, but that is kind of the point. The way it works is you put any tangible items that serve as memories into the box, so you will always have the memories of your last year of high school. What makes this craft my all time favorite is that there are so many ways you can customize the box using various materials. My favorite materials to use are letter stickers, pearl rhinestones, lace ribbon, and craft paper on the inside.
There isn’t much of a guide for this craft because of how many ways you can design it. If you are painting on it, I recommend sanding and then adding a gloss-like finish to seal after painting. That is one mistake I made that I wish I did before putting on the lace and sticker embellishments.
Materials Needed:
- A medium sized wooden box/chest (I got mine at a craft store)
- Acrylic paint
- Scissors
- Colorful cardstock paper
- Any other additional supplies you want to add (I used lace ribbon, pearl rhinestones, sparkly sticker letters, cutouts from magazines for the inside, and butterfly collage items)
- 2026 Vision Board

I have been making vision boards every year on New Years Eve since 2023, and it is always a big hit with friends and family. Its purpose is to serve as a reminder for any goals you want to accomplish in that upcoming year. Also, making vision boards is a great way to pass time while waiting for the New Years ball to drop. In particular, I like going all out with mine and spend about two to three hours making it. This includes planning, getting all my materials, cutting out images, printing, etc. Furthermore, this craft is fairly easy and inexpensive (minus the time it takes to get the placement right).
Once again, once you have the materials, it is a very easy craft to do and does not need a comprehensive guide. I recommend printing pictures and picking your placement before gluing down the images.
Materials Needed:
- Any type of poster board (I usually use a larger one so I have the most space to decorate)
- Glue or tape
- Magazines or printed images
- Any extra embellishments (I use pearl rhinestones and ribbon)
- Lip Balm Keychains

This is another very recent craft I have been obsessed with, especially because I already have most of the materials from my jewelry supplies. In my opinion keychain making is very similar to jewelry making since I am used to working with all the different metal components and charms. Unlike some of the other crafts, this one is more expensive due to the various materials needed.
Materials Needed:
- Any type of lip balm that is in a squeeze tube (EOS, Summer Fridays, Laneige, etc.)
- Silver or gold eye pins
- keychain making kit (I got mine from Michaels: Rhodium Keychain Making Set)
- Crafting pliers (I recommend round nose pliers and bent nose pliers)
- Beads and charms
- A thumbtack to poke a hole through the top part of the lip balm container (you can also use a sewing needle but be very careful when using either)
- Chain loops
- Two step looper (this makes it easier to close the eye pins when beading and that the loops are all the same size but are not needed)
To start off this craft, you will need your lip balm of choice and either a thumbtack or sewing needle. Firstly, carefully poke a hole through the top side of the lip balm container, then use the pliers to open the loop ring slightly (it opens with little force). After this, attach the lip balm to the loop via the loop ring, and use that to attach to the actual keychain part. Now this is the fun part, where you can customize the keychain however you want. Using other keychain charms or beads, attach them to the chain link pictured above. Ta da! Now you have a very cute and functional accessory for your backpack or bag.
- Memory Frame

The memory frame craft is very similar to the vision board, except you use a picture frame and any special items, such as plane tickets, handwritten letters, or any item you want to include. In comparison to some of these crafts, it is quite easy to change out the memories and even the background paper if you so wish.
Materials Needed:
- A picture frame (available at most craft stores and for a more affordable price, look at your local thrift store)
- Any memories you want to include
- Glue or tape
- Background paper
- Any extra embellishments
To start off, you need to remove the glass panel from the picture frame. There should be a corkboard backing, which is what you will use as a template for the design. Next, cut your background paper to fit the corkboard backing, or the paper liner if it comes with one. Personally, I don’t glue down the paper to the corkboard but you can definitely do that if you would like it to be more durable. Then, get to designing and glue or tape down all the memories you are using. Lastly, put the glass back into the frame and add the corkboard backing then flip over and hang it up.
- Digital Scrapbook

This is the craft I have been working on most recently. I utilize the app Canva to create these scrapbooks/collages for my instagram posts. The photo above is actually one I am currently working on. I have come to love Canva even though I do not have the subscription, which does limit the elements you can use. Another thing I like about these digital scrapbooks is that they don’t take up space in your room and are easy to edit and share.
Materials Needed:
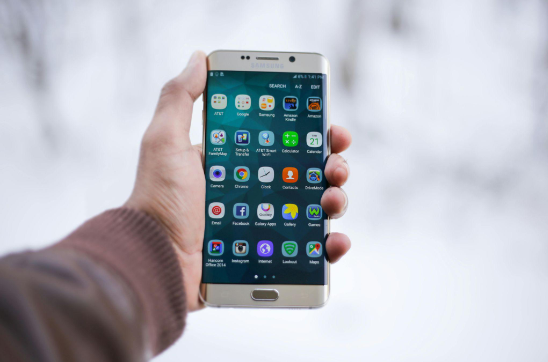
- Some type of device that can launch Canva
- Pictures and collage embellishments from Pinterest
- A basic understanding of how to use Canva
The outcome of this craft depends heavily on user skills and access to decorations and embellishments. At some point soon, I will be making a comprehensive guide on how to properly use Canva and take advantage of all the free resources available.
Conclusion
While this is only the first part of this article, these crafts are by far my favorite, because they can be continuously worked on for any period of time. Also, it helps me express my creativity while also putting something out for other people to enjoy. Hopefully this article has inspired you to pick up crafting as a hobby.